

Monday, March 14, 2011

Wednesday, March 9, 2011
Cattitude Stamps
Oh my goodness... whenever I saw these stamps I just flipped. I LOVE these cats... Then I realiszed that they were on clearence ($3.99). This bargain lover thought she was going to have a heart attack! Purrrrfect...


 |
| This one is my favorite... So Sassy! |
Tuesday, March 8, 2011
One of my headbands... on a beautiful baby girl. Makes me smile!

Once again, I have to give credit for a beautiful photo to my friend Sharon Korsu for capturing such a precious moment.
Monday, March 7, 2011
Bird Cage Tutorial
 |
| I saw a simiar project online and just had to recreate it. I really like birdies this time of year. |
 |
| First I cut 6 strips of printed paper measuring .5"x12" |
 |
| Then I stacked all 6 strips on top on one another. Using a ruler I found the center and punched a hole. Then I used a brad to attach the strips together. |
 |
| For the base I used the lid from a Nutella jar. Althought I don't have any idea why, but I have had it saved for a while now and was so happy to finally utilize it. Then I measured the rim of the lid so I could cut an additional strip to cover it. Mine measured .75" x 12" (I didn't quite need 12" but it's always better to have more than not enough) |
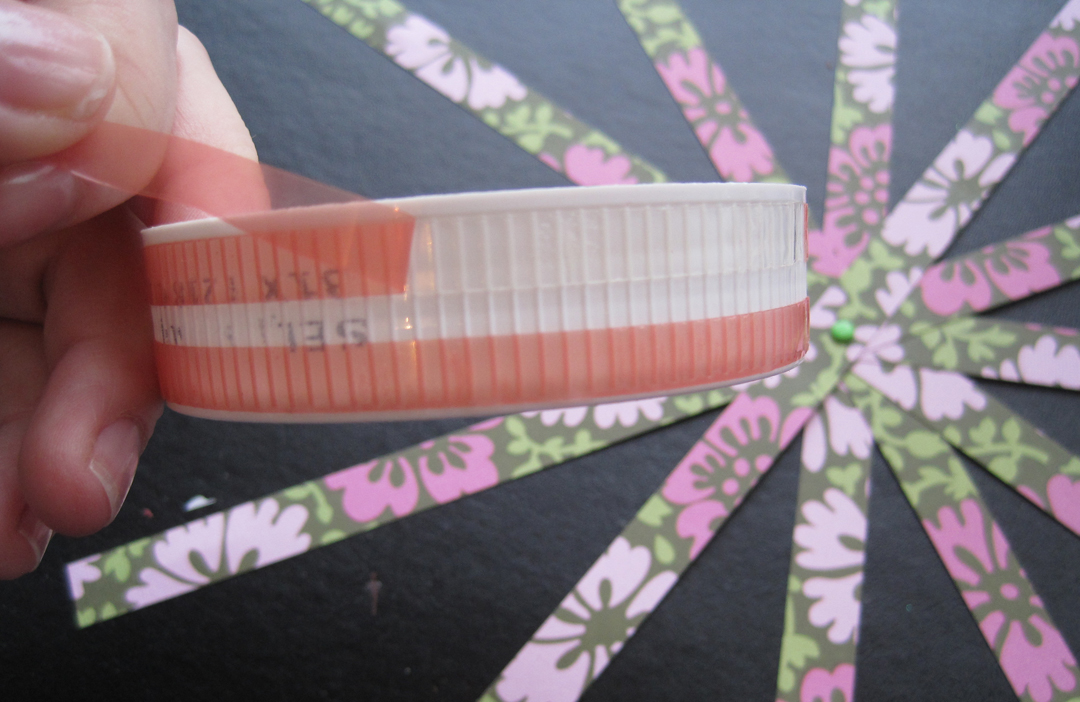 |
| Next I addred Sticky Strip (or you can use another very strong adhesive) around the lid. In the background you can see that I spread the strips to form a sunburst sort of a shape. |
 |
| To assemble the cage I started attaching the strips to the adhesive on the lid, one by one. Make sure to leave an opening so you can more easily add the spanish moss and your birdie inside the cage. |
 |
| One of the things I would do differently next time is attach the bird to the inside of the cage before attaching the top to the base. It would make things much easier. What I did this time, was punch two bird shapes (using my awesome Stampin' UP! punch) and sandwiched a string between them. I used a silver cord, but a clear thread would look more like the bird is flying. Then I tied the other end of the cord to the base of the brad (on top on of the cage), so my bird hangs in the center. Then I attached the last of the top to the base and covered the bottom with the strip I precut earlier. I also added a few flowers to the cage for an extra little touch. |
 |
| Here are the latest "birdie" projects I created. |
Friday, March 4, 2011
2010 Family Mini Album
Here is a mini scrapbook I made to capture some memories from 2010. This was inspired by a tri fold card that I saw somewhere around Christmas time. Definitely will be doing one of these projects at one of my classes.


 |
| The band that holds it all together features one of the flowers I will be teaching how to make next week. |

 |
| Beautiful family picture taken by the very talented Sharon Korsu of Creative Images 4. Check out her work at http://www.korsuphotography.com/ |
 |
| Looks like I need a new camera... but at least this gives you an idea of what the album looks like open. |
Wednesday, March 2, 2011
Just a little peek...
Here is a little sneak peek at one of the flowers we will make at my first class. They are about 3" in diameter. Super cute and shabby... and oh so easy to make.


Tuesday, March 1, 2011
Flower Headbands
Some of the flowers I created the other day have made their way on some stretchy headbands.
Most of the flowers were made from "upcycled" items. I am all about being thrifty and have gotten donations from friends, who have daughters and actually own PINK things.


Most of the flowers were made from "upcycled" items. I am all about being thrifty and have gotten donations from friends, who have daughters and actually own PINK things.

Top left is made from a dress. Top right is just satin fabric I had.
Bottom - these three flowers were made out of a man's button up shirt.
Bottom - these three flowers were made out of a man's button up shirt.

Top two were made from fabric scraps I had around and the bottom flower
is made out of cashmere sweaters. It is SUPER soft!

Left flower is made from a dress.
Right flower is made from flower petals found in the clearence
section of the wedding isle at Michaels. I LOVE beautiful bargains.
Subscribe to:
Posts (Atom)