Friday, April 8, 2011

Cozy Flower Pillows

Flowers are such a huge trend right now.  Seems that lately I have been seeing flower pillows on all the awesome blogs I follow.  Here are some of my favorites.  Most of these are quick and easy tutorials to make your own. 


These flower petal pillows  just use scraps of fleece...  Fleece is so inexpensive and cozy and doesn't fray, so you don't have to worry about the edges unreveling.


This Ruffled Rosette Pillow might require some sewing... but I bet I could glue it together.  The end result is great and vibrant.
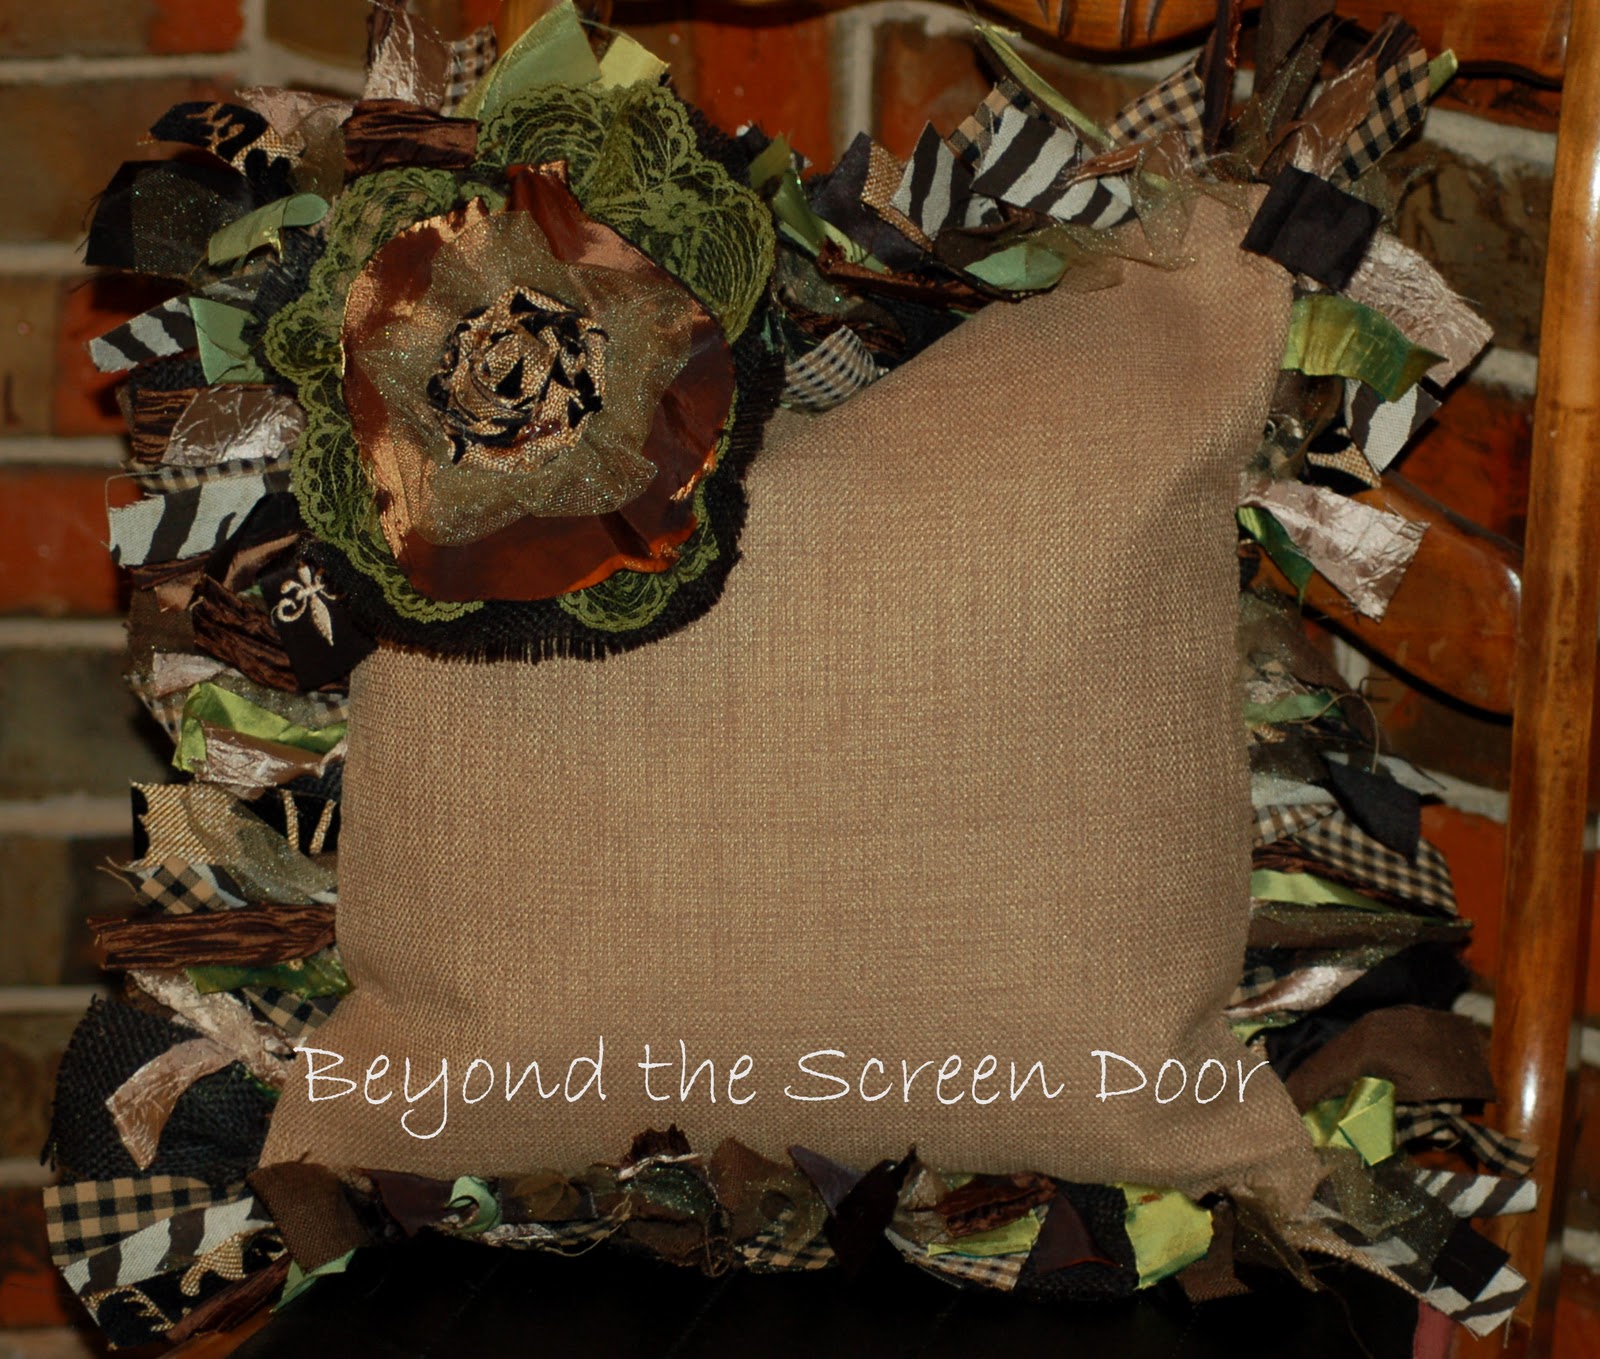


This shaggy ruffled pillow also uses up a lot of fabric scraps and has more of an earthy feel to it.  I like projects like these, where you don't have to be perfect because its imperfection also happens to be its beauty.


These pillows are made with the Oh So Yummy Amy Butler fabric.  I just love Amy Butler's style and vibrant colors.  Always a great pick-me-up for me.


And last but not least, here is a video, where Kim and Kris of the "DIY Dish" share how to create fabric Yo-Yos.  Those are very popular these days as well.  Click here to view more items they have made with these fabulous flowers.

Wednesday, April 6, 2011

House Number Sign

We've been living in our house for over a year now... but until today haven't had our house number displayed anywhere.  Cricut to the rescue, once again.  I absolutely love the way this turned out.

I noticed that burlap is so popular these days.  You can see it in all the upscale stores.  It's so inexpensive but has great texture and is very easy to work with.

For this project, I started with a square of burlap and frayed the edges.  Then I cut out numbers 2 and 6 using my friend the Cricut out of fabric.  I used iron on thing-a-majigy (what is the name for it???) to attach the numbers to burlap.  I also cut out "Creme" on the Cricut, out of freezer paper this time.  Ironed that on the burlap and used it as a stencil.  Then I used some heavy duty glue to attach the whole thing to the wood plaque, which I painted using acrylic paints and a layer of mod podge (mainly for texture).  For the finishing touch I added some upholstery tacks to each corner of the burlap.

I frayed the edges of the fabric numbers a little to give it a more shabby look.


I just love all the textures on this sign.  Here is a closer look at the burlap and painted background... along with that really cool tack.


Tuesday, April 5, 2011

Class Registration

Quick Reminder: Registration deadline for the next class is this Friday. If you haven’t registered, but would like to come, please let me know, so I can plan accordingly. I do have space left in both sessions… and please feel free to invite friends. Hope to see you next weekend!

Tuesday, March 29, 2011

Love it!!

I just love it when the UPS man brings me goodies...  :)

Saturday, March 26, 2011

Savvy Cat Sign and Sunflower Saturday

I am loving my new Cricut Expressions.  This past week I purchased a software called Sure Cuts A Lot, which allows me to cut out images that I create on my own.  I have been playing with Adobe Illustrator, coming up with all kinds of ideas.  Here is a sunflower I made today.  I designed it in Illustrator and then used my new SCAL software to cut it out on the Cricut.  Then inked and curled the edges and glued all the pieces together.  This one measures about 3 inches around.


I am also in the process of making a wooden sign that says Savvy Cat.  Cricut has been a big part of this project as well.  I got some wooden flower shapes at the dollar store the other day...  a whole package of 10 was $1!!!  And for some reason I had 11 in mine, but I won't complain.  Painted them green (of course).  This paint is really cool.  It's metalic.  I also painted the edges with another green paint that's super glittery.  Then I added letters, which I cut out using my Cricut (love this machine!) in the middle and Mod Podged over the whole thing several times.  I am so happy with the way this project is turning out so far.  Hopefully I will have more time to play with it tomorrow...  teal and brown are the plan for the background.


Friday, March 25, 2011

The Walrus aka Chloe's new toy


I have made these toys for Chloe several times, and she absolutely loves them.  They are quick and easy to make and are pretty much free.  First, let me explain why we call it "the walrus".  Well, I will let the pictures speak for themselves:


And as I was looking for a picture of a walrus on the Internet, I also came across this one:

Pretty disturbing, huh?  Someone took the time to Photoshop this poor puppy's face on the walrus' body.  Reminds me of a certain dog that lives in my house.  Anyway... back to the toy.

I got this really cool stash of shirts from my niece today.  I have been looking for some pink, since it's Chloe's favorite color (at least I think so)... so thank you Grace for your donation.


Here is how you can make your own "Walrus" toy:

Supplies you will need - t-shirt and scissors.  Yup, simple as that.

First disassemble your shirt.  Because mine was a smaller size I needed to find the biggest piece I could work with.  You want a nice solid piece with no seams.


Lay your fabric piece flat and cut it into as many wide strips as you can.  I made mine about 2.5" - 3" wide and ended up with 8 strips that were about 15" long.  You can use more strips, it will make your toy fuller.  Less strips will make it kind of flimsy. 


Then stack your strips and tie a knot in the middle.


Now take each strip and cut it into thinner stips toward the knot.  I made mine about 1" wide.


Once all your strips are cut, take each one and stretch it out.  They will form these cool tubes.


And once that's done...  you have yourself your very own Walrus Toy. 
Tah - Dah!!!


I also used some of the same fabric to make this really cute headband for my niece as a Thank You for parting with her old clothing items... and allowing me to cut them up. 

Saturday, March 19, 2011

New Toy - Cricut - In GREEN

I have been thinking about getting one of these for a while now... and today was the day.  I saw them at Walmart in a few cool colors... and they only had one green... and it was on sale.  Well, I think it had my name written on it.  So, I just had to splurdge and get it.  You might not see me for a while, I will be playing with my new toy!  Can't wait to plug it in...